Showing posts with label Upcycle. Show all posts

April 22, 2013

Mint Dresser

This dresser has been handed down in my family for awhile now.


This is how it's been since my sister was little and it was in her room.
When I was a baby it was yellow.
Before that it was just plain old wooden and belonged to my dad and his brother.
My dad said he had one side and his brother got the other

I've need a dresser for awhile now and when I came around this little buddy just chillin' all by it's lonesome in the basement, I decided to bring it back to life.

I didn't really know what color I wanted. I just knew I wanted something light and refreshing. 
I finally decided on a mint color.
Here's the finished dresser


Sorry about the blaring sun. That's what I get for taking an iphone pic.
I used Behr's Tropical Dream and dry brushed Pastel Jade over it. 
It turned out just like I hoped it would!
I got the knobs at Hobby Lobby for 50% off....score!
They are all blinged out, which I love since I'm all about the sparkle.


It's been a great little dresser and keeps on impressing!


December 4, 2011

Secret Fairytale Lamp

I had this old hanging lamp


I was kinda getting sick of it.

Makeover time!


It's magical!
Like turning a frog into a prince
  or
a pumpkin into a carriage
or 
a poor maid girl into a Princess

. . . . . . . 

Here's what I did:

I got on the Silhouette on-line store and found this cute picture
and frame
I just love the frogs legs!

I'm kinda into the whole fairytale theme that seems to be around lately.
My new favorite show is Once Upon A Time.
If you haven't seen it, I highly recommend it!!

I spray painted the outside with the new Krylon Glitter Blast spray
in Diamond Dust---that seemed Fairytaleish


it was supposed to come out like this
all nice and glittery
mine not so much

it more just left a shimmer
I'm going to try again someday
but for now it will do

I got the idea do to the secret picture from Anthropologie
Lots of other bloggers have done this too
Just google secret silhouette in lamp
Some of my favorite were from Mandi at Vintage Revivals
She did THIS and THIS

I just sprayed my picture with spray adhesive glue and stuck it inside


Now I can dream about my frog prince


November 27, 2011

Hailey's Headboard

Hailey decided to repaint Brad's old headboard. 
 It was tan and dark blue and from his room when he was little. 

So much better!

Blue, yellow and gray!

The stencil is the same one I used for my self-redo.

Here it is set up in her apartment.
Sorry, she moved right after, so this is the best pic we got


You get the idea right?!

It was fun while it lasted :)


October 5, 2011

Upcycled Pillow

 I had this pillow that I LOVED. I loved the beads and the colors. I was sad to get a new bedspread because it no longer matched. For a long time I've just turned it around to the plain side to make it match.


I decided one day while looking at this pillow that those colors would be my wedding colors one day...that's how much I love it! I was looking at it the other day and said to myself..."Self you know you could just paint the brown petals black and then it would match your bed again!" So that's just what I did.


Easy peasy! Now I get to enjoy my pillow again! Hooray!

June 2, 2011

Shelf Redo

This was my first furniture refinishing project....and it turned out exactly how I envisioned it would!!!

 I needed to organize my room...big time. I forgot to take a picture of it, but I had bags of D.I finds, and who know what all in a huge pile. It was driving me crazy.

        I really like this look

                               Source                        

I just don't like the price tag on it.

So its a good thing I like to make things on my own!

 I drove to the D.I. and found this bad boy!


 Pretty awesome huh?! Someone had done their very own DIY project and gave it away. It was extremely dirty, but cleaned up well. They had pretty much just put some particle board and junky pieces of wood together, but I think it is magic!

I originally planned on leaving it black, but once I got it in my room it was too domineering. So I went for white.

I was so excited to try spray painting furniture, like I see everyone do. Well didn't turn out so good for me. I didn't use Kiltz primer like everyone does...I used Krylon. That could have been mistake numero uno....or it could be that my spray paint was really runny. It started out good, but one bottle ruined the whole thing.  (One bad apple, don't spoil the whole bunch, girl! ) Ha ha! Well in this case it did. No matter what I did it make those annoying runny streaks.

I gave that up and went to Home Depot and bought one of their sample paints for under $3. I got the Glidden brand because it already had a little gloss to it (the others come in a flat sheen, so I purposely bought the one with a slight gloss). It worked wonders and saved the day!

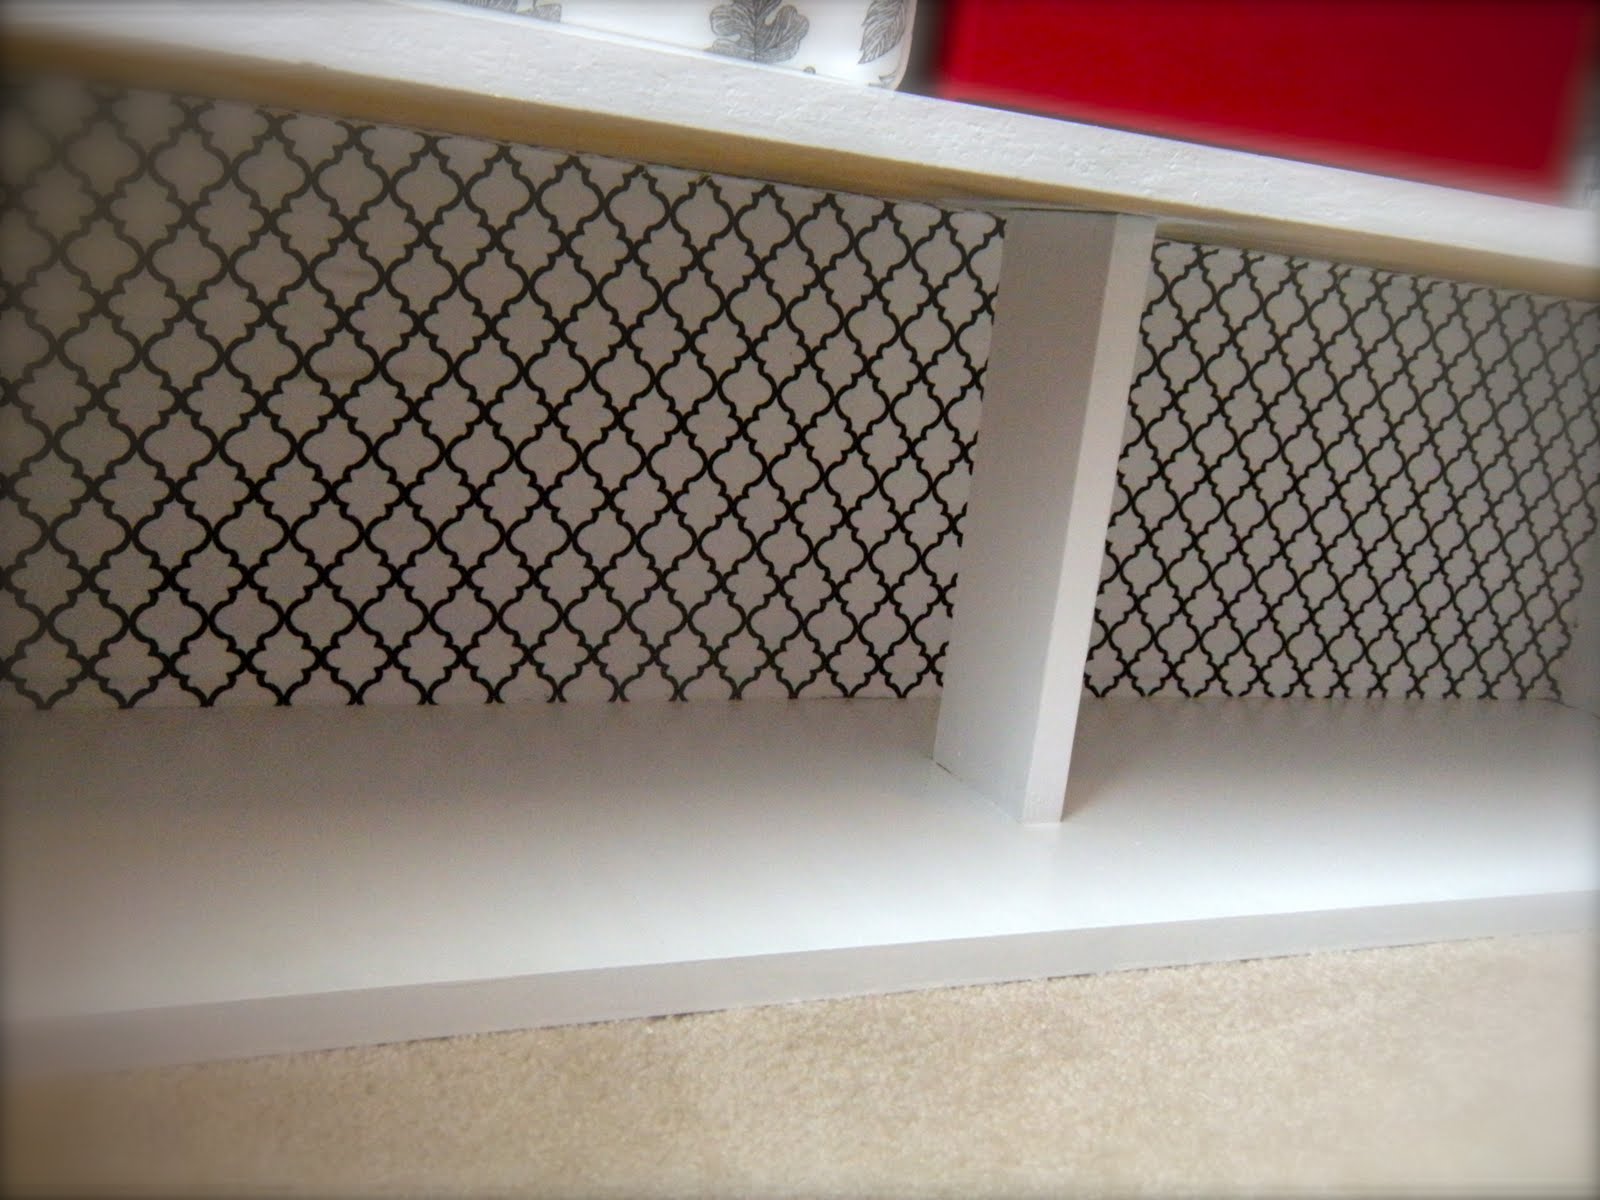
My next plans were to stencil the top and add fabric to the gross back.....

Here's how it turned out!


 I found the stencil on-line. I just googled decorative stencils. I knew I wanted a design like this and I found one! I printed it out on cardstock and scaled it to the size I wanted.

When that was done I went through my fabric scraps..

I like to raid the clearance section at Hobby Lobby. I try to get all mine for under $2. I think this piece of fabric was made for this shelf. Yes, they are indeed soul mates! I barely had to cut anything off of it!


     L.O.V.E it!

To put the fabric on I bought some Elmer's spray adhesive....stupid idea.

Maybe for smaller pieces of fabric.

Instead I just Mod Podged it on and whala! Done!

I got all the cute boxes at IKEA. Most were $5 and a couple were $10! That's my kinda deal!

I'm in love with this and have so much space for all my junk. Now it's all organized and tucked away where you can't see it!

April 28, 2011

I've been FRAMED part 2

Remember how I said I was going to paint my other frame white....well I did and LOVE it! It turned out way cuter than I even pictured it would. I love how the glaze turned out too! See what I mean......


 I love it against the purple wall and with my teapot! Yay for cute frames!

April 13, 2011

I've been FRAMED

New obsessions=old vintage frames. I get sucked into every blog I see that has painted a frame with cool details. I'm running out of space on the walls in my room for any big, huge, chunky frames....one day that will not be a problem, but for now I have to be patient and do what I can.

While on a D.I run with my bro (he was looking for a guitar...no luck), I scored 2 of these babies for $2.00....

I said in a whisper, but almost out loud..." No way! Score! These are mine" I was so excited! I had to look around to make sure no one saw how enthusiastically I grabbed them off the self. I actually like the brassy color and if that was the look I was going for I would have actually left them as is. I decided to paint one deep purple and the other one white. I haven't done the white one yet, but here is Miss Purple in all her glory..


 I wanted to give her a glazed look to bring out the details. I used a metallic silver acrylic paint. After I spray painted the frame purple I basically just painted on the metallic paint making sure to get it in all the crevasses and then just wiped the excess paint off until I had the look I wanted.


She is B-U-TIFUL! I can't wait to see how the white one will turn out. I'm going to glaze it as well, but wait until you see how! I'm super excited!

Thrift Store Chalkboard

While strolling through the D.I one day I came upon this "beautiful" tray. Ha! Not! I thought wow that is one ugly tray and I have got to have it, for $1 I wasn't really breaking the bank.

I again got ahead of myself and painted it before I got the pic taken. Just to paint the picture for you of what it looked like before, it was dark wood with bright purple, blue, red, pink, orange and green painted flowers and other designs. It's something that you would probably have someone in Tijuana try to sell you for like 30 bucks. You can kind of see through the paint if you squint really hard 


Can you see it now?  You get the idea. ..right?! Now unsquint (yep that's a word..) your eyes and this is how it turned out!


I primed it and them sprayed it with chalkboard paint. After it was dry I painted the back and around the edge. This is one of my favorite quotes and something I have to constantly remind myself to do! I love that it is in a place where I can always see it and be reminded to enjoy this journey that I'm on.

January 25, 2011

Glittery Apothecary Jar

I am in love with apothecary jars! I have always wanted one, but have never caved into buying one because of the price. I was literally jumping for joy when I stumbled upon Courtney's blog A Diamond in the Stuff and her Apothecary Jar out of Junk. It was the darn cutest thing I had ever seen. I drove myself to the DI and was in heaven when I found an entire row of selves filled with vases. I then just walked around trying to find potential in the rest of the junk that was there. I came home with 5 bags of junk to make some cute jars. I had so many ideas in my head...it was great. The sweet cashier wrapped each of my glass/ceramic purchases up in newspaper. A big thanks to her, we could have had some casualties on the way home. So weirdo me. I didn't switch over from video to camera mode, so you get a video of the junk before..ha ha. So after much ado here is the before junk......


I love it! Both items were $1.50! I couldn't believe it. I actually like the ceramic jar and it gets better there was a larger one there too for 2 bucks! So you betcha I got both of them.  I decided to spray paint the jar black. I got it all done, and was about to start gluing away when the saddest thing ever happened. My mom offered to help wash the vase....now time to take a bird walk. Go back to the DI with me. I had found these super cute jars and went back to the vase isle to find a vase that would fit perfectly. I had the jar sitting in the middle of the isle and was measuring away. Some lady gave me a weird look as she passed me...whatever I was in creative mode. I found vases that perfectly fit each object. So the above vase was the perfect fit and I loved the shape of it with the little lip at the top. Ok back from bird walk time....my mom was washing the vase and no lie we had a Christmas story moment. I hear the most terrible cracking noise and a gasp. I turn around and there she is standing with the remains of a broken vase in the sink.  After a moment of panic, I was able to use one of my other vases. That poor vase...I think it was really old and it was very thin glass. Not my mom's fault...just the vases... for being old. It was a good thing that it wasn't all finished and didn't break en route to my friend. I glued the vase into the jar with Gorilla glue and this is the final project:


Please excuse the bad pics, I was in a hurry. I love how it turned out! I got the glittery ornaments in the dollar section at Target. I like the little tiny ones at the bottom. I had the ribbon at my house already. So total cost was 6 dollars!